
How to Set Up an FM Radio Station
A complete step-by-step guide to launching your own FM radio station -- Whether you're starting a community station, church broadcast, or commercial operation, we cover everything you need.
Quick Start: The Minimum Equipment You Need
Starting a radio station sounds complicated, but the core setup is simpler than most people expect. You need six pieces of equipment -- connect them in the right order and you're broadcasting. Here's exactly what goes into the signal chain:

Captures your voice or audio source. A dynamic cardioid mic is ideal for most broadcast environments -- it rejects background noise and handles loud sources well.

Combines multiple audio inputs -- mic, music player, phone line -- into a single balanced output. Controls volume, EQ, and gain for each source independently.

Compresses and limits the audio signal before it reaches the transmitter. Protects your transmitter from overmodulation and makes your broadcast sound louder and more consistent.
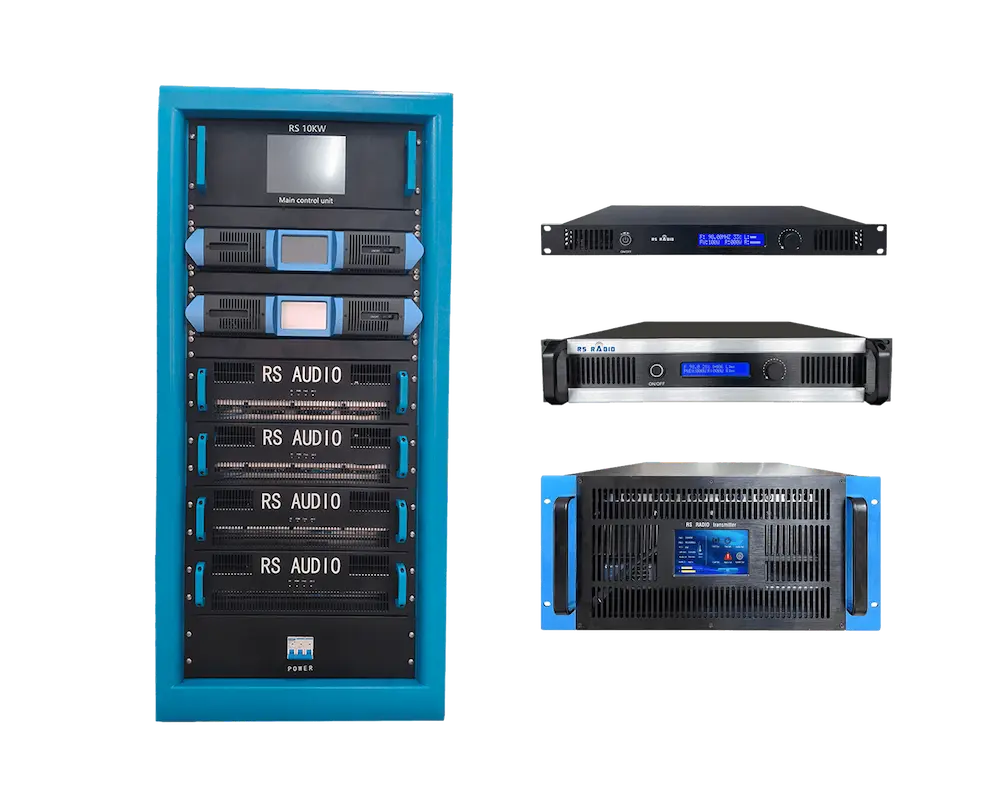
Converts your processed audio into an FM radio frequency (87.5-108 MHz) and amplifies it to your required power level. This is the heart of your station.

Carries the RF signal from your transmitter up to the antenna. Cable quality directly affects how much power reaches your antenna -- a bad cable wastes power as heat.

Radiates the RF signal into the air. Antenna height and gain are the single biggest factors in determining how far your signal travels.
Optional but recommended: Monitoring headphones let you hear your program in real time, while studio monitor speakers help you evaluate overall audio quality during production.
How to Install a Radio Station
Watch our step-by-step installation guide. We will show you every step of installing the radio -- from the audio source to the antenna -- so your station is on air as quickly as possible.
Connect Your Audio Source
Plug your audio source (mixer, PC, or player) into the transmitter's audio input using XLR cables. Set the input level to avoid distortion.
Wire the RF Output & Coaxial Cable
Connect the transmitter's RF output port to the coaxial cable. Ensure the N-type or 7/16 DIN connector is tightly secured and impedance-matched to 50Ω.
Mount & Connect the Antenna
Install the antenna at the highest accessible point. Connect the coaxial cable to the antenna base. Greater height means greater broadcast range.
Set Frequency & Power On
Select an unused FM frequency between 87.5-108 MHz using the front panel or display. Power on the transmitter and verify the output power reading.
Run Your First Broadcast Test
Tune a radio receiver to your chosen frequency and confirm clear audio reception. Walk the coverage area to verify signal range matches your transmitter's power spec.
Complete Station Setup (Start to Finish)
Transmitter → cable → antenna connection, frequency setting, and first broadcast test. Everything covered in one walkthrough.
Need hands-on help? Our engineers are available via WhatsApp to guide you through installation in real time -- at no extra charge.
Going Commercial: Additional Equipment for a Professional Station
If you're building a licensed commercial station -- or a professional community station with a real audience -- you may need the following six broadcasting equipments. Here's what professionals add and why each piece matters:

4G Broadcast Hotline Phone
A 4G desktop phone allows listeners, reporters, or remote guests to connect directly with the station. It can be integrated with a telephone hybrid or audio mixer for live call-in programs and interviews.

Microphone Arm
A desk-mounted boom arm holds your microphone at the perfect position and keeps it out of the way when not in use. Broadcast-grade arms use internal cable routing to keep your desk tidy and include a shock mount to absorb desk vibrations before they reach the mic capsule.

On-Air Light
A wall-mounted or door-mounted illuminated sign that lights up red whenever a microphone is live. It signals everyone outside the studio to stay quiet and not enter. Wired directly to your console's tally output or a relay triggered by your mic fader, it is a simple but critical piece of studio discipline equipment for churches, schools, and community stations alike.

Broadcast Computer
A dedicated PC running broadcast automation software manages your music library, schedules commercials, and keeps the station on air 24 hours a day without a live presenter. Software such as ZARA Radio, RadioBOSS, or SAM Broadcaster lets you pre-load an entire week of programming. For small stations and churches operating on limited staff, automation is what makes 24/7 broadcasting practical and affordable.

RDS Encoder
Sends your station name, song title, and other text data to listeners' car radios and home receivers. It's the small display that shows "WKRP FM" on a car stereo. Listeners expect it. A dedicated RDS encoder lets you control this data from a computer in real time, updating track information automatically when paired with your broadcast automation software.
How Much Power Do You Actually Need?
This is the question every new station owner asks first. The honest answer: FM transmitter range depends on power output, antenna height, antenna gain, terrain, and urban clutter -- all at the same time. Power is just one variable, but it's the one you control most directly.
Here's a practical reference table based on real-world deployments. These numbers assume a half-wave dipole antenna at 30 meters height on flat terrain. Your actual range may be higher with better antenna height or lower in hilly, urban environments.
| Transmitter Power | Typical FM Range | Best Use Case |
|---|---|---|
| 7W - 15W | 1 - 3 km | Drive-in theater, indoor campus, small church |
| 50W | 3 - 5 km | Community station, school radio, farm broadcast |
| 100W | 7 - 12 km | Small town coverage, suburban community station |
| 300W | 15 - 20 km | Regional community station, mid-size city |
| 500W | 20 - 25 km | Licensed commercial station, full city coverage |
| 1000W (1KW) | 25 - 30 km | Large city + surrounding region |
| 2000W (2KW) | 30 - 60 km | Province-wide or state-wide broadcast |
| 5KW - 10KW | 60 - 150+ km | National network, major broadcast region |
Important: Doubling your power does not double your range. Due to the inverse square law, you need to increase power by 4× to double the FM transmission distance. Going from 100W to 400W extends your range by roughly 2×. This is why antenna height is often more cost-effective than buying a bigger transmitter.
Calculate Your Exact Coverage Area
Use our interactive coverage calculator to enter your transmitter power, antenna height, and terrain type. It gives you a realistic coverage radius and map overlay for your specific location.
Open Coverage CalculatorFM Broadcast Licensing: How to Get Legal
Broadcasting without a license is illegal in virtually every country. Unlicensed transmitters interfere with other stations, emergency services, and aviation communications. Getting licensed protects you legally and protects your audience's experience.
United States (FCC)
- Low Power FM (LPFM) : up to 100W, covers a 5.6 km radius. Available to nonprofits, schools, and community organizations. Apply through the FCC's LPFM filing window.
- Full-power FM: requires an FCC construction permit and license. Process takes 12-24 months and involves frequency coordination with neighboring stations.
- Part 15 (unlicensed): legally limited to 250 µV/m at 3 meters -- effectively less than 200 feet of range. Not viable for any real broadcast purpose.
Africa (Nigeria, Kenya, Ghana, Tanzania, Congo, etc.)
- Each country has its own telecommunications regulator (NCC in Nigeria, CA in Kenya, NCA in Ghana). Contact them directly for community and commercial broadcast license applications.
- Most regulators require a frequency assignment, a technical specification document, and proof that your equipment meets technical standards. Our transmitters are CE and FCC certified -- this documentation is accepted in most African licensing processes.
- Community radio licenses typically allow 50W-300W. Commercial licenses allow higher power levels.
Philippines, Mexico, and Latin America
- Philippines: NTC (National Telecommunications Commission) issues broadcast permits. Community radio stations typically start with 100W-300W allocations.
- Mexico: IFT (Instituto Federal de Telecomunicaciones) manages FM licensing. Community and indigenous radio stations have a separate simplified process.
- Most Latin American countries follow ITU Region 2 frequency plans and require equipment with international certifications.
Our equipment comes with CE and FCC certification documentation -- the two most widely recognized standards globally. When you order from us, we provide the technical specification sheets you'll need for your licensing application. If your regulator has specific technical questions, our engineers can provide written technical support.
Choosing the Right Antenna
Your antenna is one of the easy way to increase your FM transmitter range. A 100W transmitter with a high-gain antenna at 60 meters height will outperform a 300W transmitter with a basic dipole at 20 meters. Height and gain matter more than raw power.
Antenna Types Compared

Ground Plane Antenna (0 dBd gain)
A simple and cost-effective omnidirectional antenna that provides uniform coverage in all directions. Easy to install and tune, it is commonly used for low-power FM broadcasting, temporary stations, and starter setups.
Best for: Low-power FM stations, temporary installations, and budget-conscious broadcasters

Half-Wave Dipole Antenna (0-3 dBd gain)
A widely used FM broadcast antenna that provides reliable omnidirectional coverage and consistent performance. It has simple design, low wind load, and ease of installation.
Best for: 100W-200W stations, commercial broadcasting, city coverage

Multi-bay FM Dipole Antenna (3-9 dBd gain)
Multiple antenna bays stacked vertically, each adding gain by focusing the radiation pattern toward the horizon. A 4-bay array gives roughly 6 dBd gain -- the equivalent of multiplying your transmitter power by 4×. Used by commercial stations that need maximum range from a given power level.
Best for: 500W-10KW stations, provincial and national coverage
Rule of thumb: Every 3 dBd of antenna gain doubles your effective radiated power (ERP). A 300W transmitter with a 6 dBd antenna has an ERP of 1200W -- equivalent to a 1200W transmitter with a basic dipole. Match your antenna to your tower height and coverage goal, not just your transmitter power.
Feedline Selection: Don't Lose Power in the Cable
Every meter of coaxial cable between your transmitter and antenna loses some RF power as heat. At FM frequencies (87.5-108 MHz), this loss is significant enough to noticeably reduce your range if you use the wrong cable. This is one of the most overlooked factors in FM transmitter range calculations.
| Cable Type | Typical Loss (30m @ 100MHz) | Power Retention | ERP Coefficient |
|---|---|---|---|
| 30M Standard Cable | 1.2 dB |
|
0.76 |
| 30M Premium Cable | 0.9 dB |
|
0.81 |
| 1/2" Foam Cable | 0.7 dB |
|
0.85 |
| 7/8" Foam Cable | 0.4 dB |
|
0.91 |
| 1-5/8" Foam Cable | 0.2 dB |
|
0.95 |
| 3-1/8" Rigid Line | 0.1 dB |
|
0.98 |
Key Feedline Rules
- Minimize connector count. Every N-connector or PL-259 adds 0.1-0.3 dB of loss and is a potential failure point. Use the fewest connectors possible between transmitter and antenna.
- Weatherproof all outdoor connections. Self-amalgamating tape over connectors prevents water ingress. A single corroded connector can increase VSWR and reflect power back into your transmitter, triggering its protection circuits and reducing output.
- Match cable to power level. Using RG-213 on a 500W transmitter with a 30m run loses roughly 10% of your power before it even reaches the antenna. Step up to 7/8" hardline for any run longer than 20m on stations above 100W.
- Check VSWR after installation. A VSWR above 1.5:1 indicates a mismatch between your transmitter, cable, and antenna. Most modern transmitters display VSWR and will reduce power output to protect themselves. Our transmitters include built-in VSWR protection.
Site Selection and Using STL Links
Many station owners assume the transmitter must be physically located in the same building as the studio. It doesn't. In fact, separating your studio from your transmitter site is often the best decision you can make for coverage -- and it's exactly what professional broadcasters do.
What Makes a Good Transmitter Site?
- High elevation. Every 10 meters of additional antenna height roughly doubles your coverage area. A hilltop site at 200m elevation above the city is worth more than tripling your transmitter power from a valley location.
- Line of sight to your coverage area. FM signals travel in straight lines. Mountains, dense urban buildings, and hills between your antenna and your audience block the signal. Choose a site with clear line of sight toward the population center you want to cover.
- Reliable power supply. Your transmitter site needs stable mains power and ideally a backup generator. A site with frequent power outages will cause your station to go off air regularly.
- Physical security. Transmitter equipment is valuable. A locked equipment room at the tower site prevents theft and vandalism.
Using an STL (Studio-to-Transmitter Link)
An STL is a dedicated radio or IP link that carries your audio from the studio to the transmitter site. This solves the problem of separating your studio (where you want to be, in town) from your transmitter (which should be on the highest hill available).
RF STL (Traditional)
- Dedicated licensed frequency (usually 950 MHz band)
- Very low latency, no internet dependency
- Works over distances of 30-80 km line-of-sight
- Requires additional licensing
IP/Internet STL (Modern)
- Uses standard internet connection (fiber, 4G/LTE)
- Low cost, easy to set up
- Works anywhere with internet at both ends
- Depends on internet reliability -- have a backup
Practical advice: If you're in a city and the best tower site is 10-20 km away, an IP STL using a 4G LTE router at each end is the most cost-effective solution for stations under 1000W. For stations above 1000W or in areas with unreliable internet, invest in an RF STL.
Common Installation Mistakes (And How to Avoid Them)
After supporting hundreds of station installations across Africa, Asia, Latin America, and North America, our engineers see the same mistakes repeated. Here are the most costly ones -- and exactly what to do instead.
Mistake 1: Connecting the antenna before powering on
Many first-time installers power on the transmitter to test it before the antenna is connected. Without a load (antenna or dummy load), the transmitter's output stage reflects all power back internally. This can destroy the final amplifier transistors within seconds.
Fix: Always connect the antenna (or a 50-ohm dummy load) before powering on. Never run a transmitter without a load attached, even for a moment.
Mistake 2: Inadequate ventilation and overheating
Transmitters are installed in sealed equipment rooms or metal cabinets with no airflow. Our transmitters have built-in thermal protection that shuts down at 60°C -- but if your room regularly hits this temperature, you'll have constant interruptions and accelerated component aging.
Fix: Install exhaust fans or air conditioning in the equipment room. Leave at least 10cm of clearance on all sides of the transmitter. In tropical climates, target a room temperature below 35°C.
Mistake 3: Poor grounding and lightning protection
A tower antenna is essentially a lightning rod. Without proper grounding, a nearby lightning strike sends a voltage surge through your feedline directly into your transmitter. This is the #1 cause of transmitter failure in Africa and Southeast Asia.
Fix: Install a coaxial lightning arrestor on the feedline where it enters the building. Ground the tower, antenna mast, and equipment rack to a proper earth ground rod. During a storm, disconnect the feedline from the transmitter if the station is not broadcasting.
Mistake 4: Overmodulation from unconditioned audio
Plugging a phone or laptop directly into the transmitter audio input without an audio processor causes audio peaks that exceed 100% modulation. This produces distortion on the air, interferes with adjacent channels, and can damage your transmitter's modulator board over time.
Fix: Always use an audio processor or at minimum a hardware limiter between your audio source and the transmitter. Set the transmitter's modulation to 95% maximum and monitor it with a modulation meter.
Mistake 5: Using the wrong frequency or wrong channel spacing
Setting your transmitter to a frequency that's too close to an existing local station causes interference -- to them, to you, and potentially a regulatory violation. In some countries, channel spacing requirements are 200 kHz; in others, 400 kHz or 800 kHz from the nearest station.
Fix: Scan your local FM band with a spectrum analyzer or a quality radio receiver before choosing your frequency. Confirm with your national regulator that the frequency is available. Our engineers can help with frequency coordination.
Frequently Asked Questions
How far can an FM transmitter broadcast?
What equipment do I need to set up an FM radio station?
What is the warranty policy for Risheng FM transmitters?
What happens if my transmitter overheats during operation?
Do you offer technical support if I don't know how to install the transmitter?
Not Sure About Your Installation?
Our engineers have guided hundreds of station installations across four continents. Whether you're planning a new station or troubleshooting an existing one, contact us on WhatsApp. We'll review your setup, help you choose the right equipment, and walk you through the installation step by step.
Start With the Right Equipment, Not the Most Expensive
Most stations start too big and overspend. A well-installed 50W station with a quality antenna at 30 meters height will serve a community of 50,000 people reliably. Our $1,198 starter kit gives you the transmitter, antenna, and cable you need to go on air -- backed by a 5-year warranty and engineer support. When you're ready to grow, we'll be here.
Written by Risheng Electronics Engineering Team
Liaoning Risheng Electronics Technology Co., Ltd. has manufactured FM broadcast transmitters since 2005. Our product range covers 7W to 10KW, all CE and FCC certified. We've supported radio station installations in over 60 countries across Africa, Asia, Latin America, and North America. All transmitters carry a 5-year warranty.